Archives January 2020

If your ceiling is lath and plaster watch out!

Nine years ago, the collapse of a section of the ceiling at the Apollo Theatre in London left theatre-goers covered in debris with about 76 injuries.  This brought into focus the need to maintain ceilings in period properties.

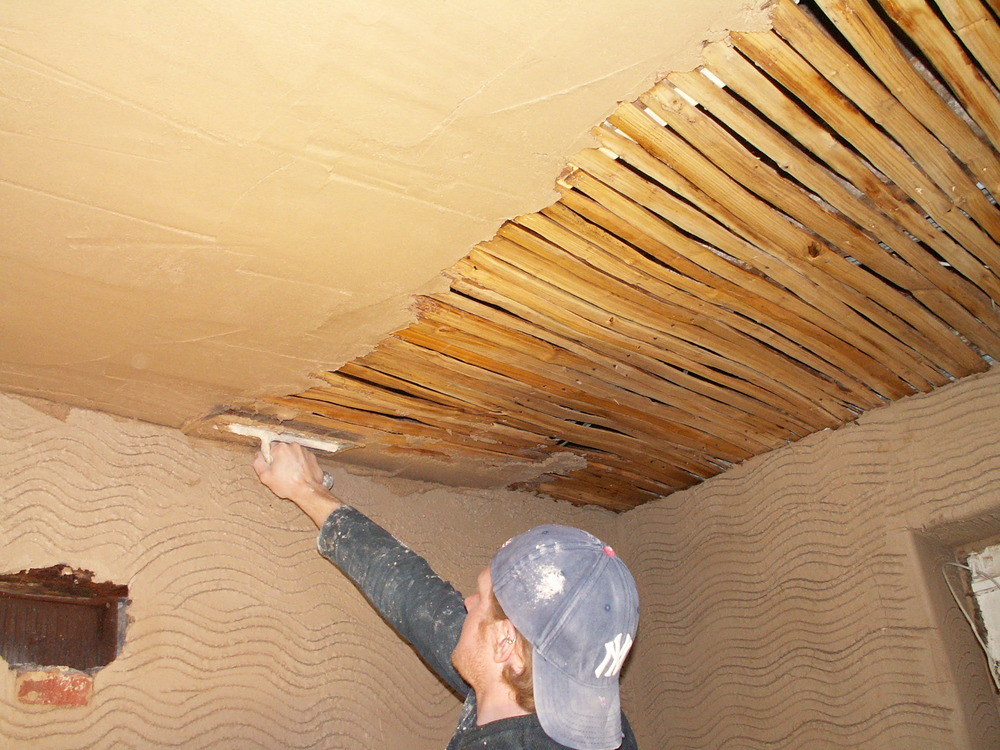
Looking at the pictures of the Apollo’s interior there is much ornate plasterwork but being built in 1901 the base of the ceiling will undoubtedly be of lath and plaster type. The laths (approx. 32mm wide by 6mm thick) are securely nailed to the timber joists above but the lime based plaster, which can be up to an inch thick, is held in place by being forced through the gaps and hooking over the tops of the laths where it sets.
KONICA MINOLTA DIGITAL CAMERA
The ceilings of modern properties tend to be plasterboarded and skimmed and are considerably more stable.

Lath and plaster ceilings do not react well to vibration or water ingress. Plaster is brittle by nature and will crack at its weakest point under vibration. In practice that means the nibs that wrap around the laths and keep the ceiling in place snap off. If enough of them snap off the weight cannot be supported and the ceiling collapses.

Similarly, water from above soaks into the porous plaster and weakens the nibs. Some onlookers at the Apollo Theatre were quoted as saying water dripped through the ceiling just before the collapse on what was a very wet evening in London. It is unlikely that water ingress on the evening would have been enough to bring the ceiling down but if water had been dripping undetected over a long period on to a ceiling that had already been weakened by vibration the combination could have caused the collapse.

A similar situation occurred last year at a clients, a development that only recently completed.  From our experience, ceiling collapses are relatively common in older residential properties that typically have lime based lath and plaster ceilings in all rooms. From our clients narration, the installation of Virgin Media broadband within the area may have led to this.  This was because, the property upstairs was empty and Virgin Media a few days prior was operating a large digger at the front of the property and had also in the process accidentally cut off the client’s cable.

Fortunately there was nobody in the room when the ceiling came down as being hit on the head by a inch thick slab of plaster could have caused some terrible injury.  This kind of claim can seem a little far-fetched and dismissed as just a coincidence as in this case however it is the only logical conclusion.  This is why when we assess properties for our clients we look for evidence that old ceilings may be becoming unstable; unevenness, hairline cracks and hollowness are all tell tale signs. If you are worried about your own property a gentle tap with the handle of a broom should tell you whether the ceiling plaster is hollow and should be replaced.  The damages from such an oversight could be costly, particularly in a rental property.  As such when we renovate old properties we advise clients to pin plasterboards below such ceilings so as to prevent such an incident.

What is fair wear and tear?

What would be considered fair wear and tear?

There is no definitive description in law but examples of what could be considered fair wear and tear are:

  • Fading and wear of a carpet
  • Furniture marks on carpets
  • Worn furnishings

Essentially any deterioration that is caused by normal, responsible use of the item during a tenancy.

Betterment and Apportionment

Even if some damage is deemed to be caused by the tenant and not due to fair wear and tear, a landlord is not entitled to an improvement (Betterment) of the original item and must apportion costs appropriately.

Example of Apportionment:

If an oven is left unclean and would cost £75 to clean, but the landlord chooses to replace the oven instead and this costs £500, the landlord can only claim £75 from the tenant.

If, however the oven is damaged and needs replacing, then the landlord is within their rights to replace the oven. Even then, though, the landlord cannot request that the tenant bears the full cost due to the wear and tear factor. If, for example the oven cost £500 and had an expected lifespan of 10 years, but, due to damage caused by the tenant, needed replacing after 3 years. In this case the oven would be expected to lose £50 per year in value and after 3 years would have lost £150. So, a landlord can claim for the residual value, which would be £350.

Fair Wear And Tear Summary

A tenant is responsible for looking after the condition of a property and its contents during the tenancy and if they do so, they cannot be penalised at the end of the tenancy for fair wear and tear which is to be expected. Fair wear and tear has to be catered for and a landlord cannot expect a tenant to put the property back to exactly the condition it was in when they moved in, unless the rental agreement specifically has a wear and tear exception clause.

What loft extension options are out there?

Of all the types of property extension the conversion of a loft space is one of the more affordable in comparison to side and/or rear extensions and they do of course, see you gain additional bedroom(s). So, what are the various types, are what do they typically cost?

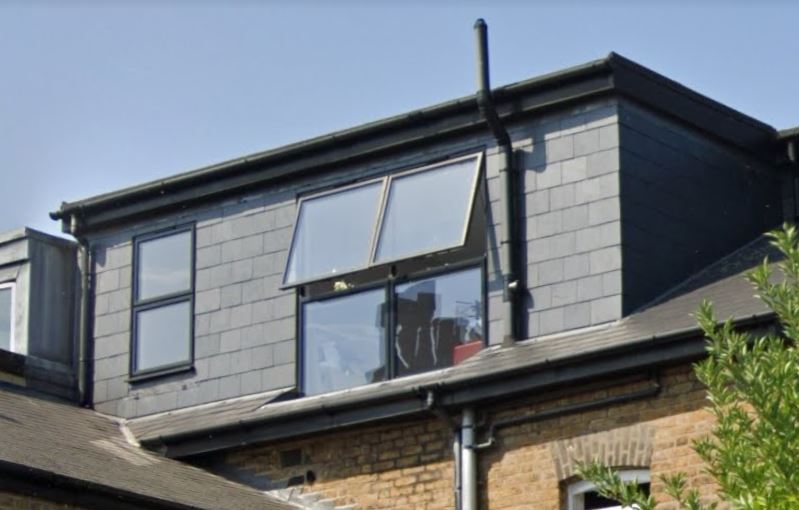
SIMPLE DORMER EXTENSION

This is the most common and most affordable extension and is a good option for most property types and creates additional headroom by creating a box shape out of the rear slope of the loft, with the outside walls often set back from the party parapet wall. The roof tends to be felt, whilst the walls are finished with hung tiles.

You can typically avoid planning permission and go for permitted development instead.  Whilst not the most aesthetically pleasing of designs, it gets you an additional bedroom and possibly an en-suite bathroom. Work takes 3-4 months.

Simple Dormer Extension

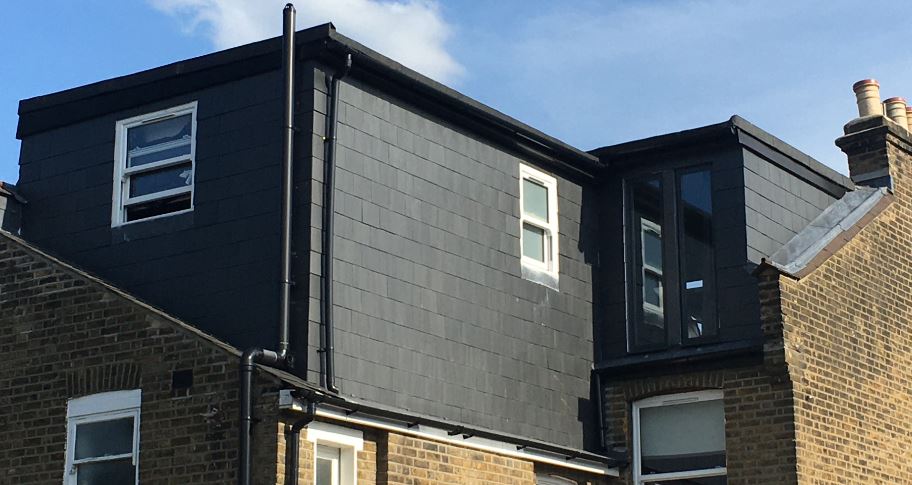
L-SHAPED DORMER EXTENSION

This is the same as above but includes an extension over the rear outrigger (the rear part of the L in a Victorian property) in which you can get either an additional bedroom, or a much larger bathroom compared to the smaller en-suite found in the simple dormer.

You gain around double the space for slightly less than double the cost, so the build can be completed in around 3-4 months.

L-Shaped Dormer Extension

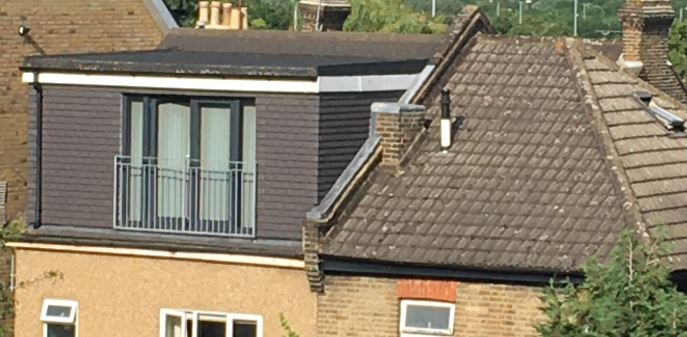
MANSARD LOFT EXTENSION

This design is more aesthetically pleasing as it involves the raising of the party parapet walls in brick which creates slightly more space and increased head height versus a dormer and is often seen in properties with butterfly roofs where such raising is essential.

Planning permission is almost certainly going to be necessary, with costs and time rising slightly compared with a dormer on sloping roof properties. This type of work takes about 4-5 months.

Mansard Loft Extension

HIP TO GABLE CONVERSION

This type is found in end of terraced, semi-detached and detached properties or bungalows and involves extending the inwardly sloping roof, creating a vertical wall. They are more expensive than mid-terraced dormer extensions by virtue of having to build up the side of the roof to then create a dormer. Semi-detached properties can end up looking lop-sided if only one neighbour has undertaken a conversion.  The conversion takes about 4-5 months.

Hip to gable conversio

What Next?

A good architect will show you how to maximise the space you have for your budget and advise you which options do and don’t require planning permission. They will produce planning/conceptual drawings and then drawings that are suitable for Building Regulation approval and you will also need an engineer who will determine where the steel beams are located having undertaken loading calculations.

Unless you are in a detached house, you will need to consider the Party Wall Act, ideally 2-3 months before you plan to start works.  Loft conversions in the grand scheme of things are relatively straight forward, but it is still worth giving your neighbours the heads up to maximise your chances of a favourable response.

If you own a flat, then it is most likely that you do not own the loft space and it will need valuing, and a premium paid of between 5 to 10% of the property value to your freeholder in addition to build costs and professional fees. Your freeholder is may insist on a license to alter, which protects their interest and other surrounding flats.

What is a party wall?

WHAT IS PARTY WALL?

The Party Wall etc. Act 1996 covers three distinct types of work; alterations to party structures (usually walls but may also be floors), the construction of new walls at the boundary and excavation close to neighbouring properties.

These are some typical examples of work that is likely to be covered by the Act:

  • Cutting beams in to a party wall as part of a loft conversion
  • Removing chimney breasts that are attached to a party wall
  • Excavating for the foundations to a new extension within 3m of a neighbouring or shared structure
  • Underpinning a party wall to facilitate a basement extension

Where work falls within the scope of the Act it is necessary for a building owner to serve notice and obtain the affected adjoining owner’s consent; if that consent is not forthcoming the parties are deemed to be ‘in dispute’ under the Act and surveyors must be appointed so that the dispute can be resolved by way of a Party Wall Agreement (technically called an ‘Award’).

If the two appointed surveyors fail to agree upon any of the issues in dispute they can make a referral to a previously selected Third Surveyor.

Property Squires will appoint an experienced party wall surveyor if you are planning on undertaking work that falls within the scope of the Act or have received a notice informing you of proposed works that may affect your property.   You are very welcome to contact us for some advice. to help ensure that everything runs smoothly.

What happens at the end of your tenancy?

At the end of your tenancy agreement, should you decide to move out rather than renew he agreement there can be a lot to consider. In this article we will walk you through the process of moving out of a rental property so that you know what to expect.

Prior To The End Date

First and foremost, give you landlord or their agent notice that you do not intend to continue with the tenancy. Once notice has been given there is a lot to do to make sure that the hand back of the property goes as smoothly as possible.

  • Clean the property thoroughly from top to bottom. Make sure all carpets are cleaned as well as any curtains. All cupboards should be emptied fully and cleaned internally. The oven and hob should be cleaned to a high standard. Make sure all shower screens are cleaned of any streaks and all sanitary wear is clean. If the landlord has provided white goods make sure these are also empty and clean. Cleaning is one of the main causes of dispute at the end of a tenancy so make sure that the property is sparkling.
  • Remove rubbish from the property and do not leave the bins overflowing.
  • Carry out any minor repairs such as filling holes caused by nails and screws, or any dinks and dents caused during the tenancy. If required re-paint the walls, bearing in mind that, even if you use the same colour, the old colour might have faded so patch painting might be very noticeable. Replace any broken lightbulbs as well and double check that any smoke or CO detectors are in working condition.
  • Tidy up the garden, mow the lawn, remove dead leaves and make sure it is weeded.

On The End Date

On the date that your tenancy terminates, ensure that you have all your possessions removed ready for the check out inspection. During the check out inspection, the inspector will use the original inspection report to compare the initial condition of the property to the current condition, considering fair wear and tear. You will be asked to agree with the contents of the report and this will form the basis of deductions from the deposit if there are any.

During this check-out, final meter readings should be taken and the utility companies informed of the end of the tenancy and the final readings. You are responsible for settling the final utility bills.

Hand back the keys to the property to the landlord or their agents.

After The End Date

Your landlord or their agent will be in contact with you regarding the return of your deposit. If there are no deductions, then this is a straightforward process. If your landlord is proposing to withhold some of the deposit due to damage or for other reasons, you will need to agree this amount. If you do not agree with the amount or the reasons, then you can raise this with the tenancy deposit scheme’s dispute resolution service.

Notify everyone you need to that your address has changed. This will be institutions such as your bank, the electoral register, doctors and the children’s school, credit card companies, car and home insurance companies and all your on-line shopping accounts. It is also advisable to set up a mail re-direct to your new property as we often forget to notify at least one company that we have moved.